Includes & Layouts: Making My Site a Bit More Automated
In 2024: Year in Review I mentioned wanting to write better posts and that I would be looking at analytics. The day after I published, I figured out how to track web traffic with Google Analytics. I’d like to share the path I took as it taught me more about how my site works under the hood, as well as give insight to my motivations.
Web traffic
Google Analytics collects data on sites via a Google tag. I won’t get into the details of how this happens, but to gain some insight into my site I had to do one of the following:
- Install with a website builder or CMS
- Install manually
I don’t use a website builder (e.g., Wix, WordPress), so I opted for the manual process—how bad could it be?
Here are the instructions:
Below is the Google tag for this account. Copy and paste it in the code of every page of your website, immediately after the
<head>element. Don’t add more than one Google tag to each page.<!-- Google tag (gtag.js) --> <script async src="..."></script> <script> ...some JavaScript code... </script>
Two things stood out to me:
- Copy and paste it in the code of every page of your website
- immediately after the
<head>element
The first I can do—I already copy/paste a giscuss <script> element to the bottom of all of my posts
so visitors can comment and react.
[!NOTE]
I’d rather find some automated way. I often forget to add the comment section when I publish and have to add it after the fact. It’s quite repetitive and I should probably automate that too.I’ve since automated this. Find out how below. 👇
The second is a bit harder.
Most of my posts are written in Markdown,
so they don’t exactly have a visible <head> element.
If I go to my actual site and inspect any of the pages, I can see 👀 that there is such an element.
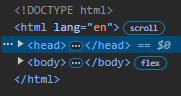
But how do I add this Google tag immediately after it?
Down the Jekyll rabbit hole
I may have mentioned it in a previous post, but my site is generated by Jekyll. From the Jekyll GitHub repo:
Jekyll is a simple, blog-aware, static site generator perfect for personal, project, or organization sites. Think of it like a file-based CMS, without all the complexity. Jekyll takes your content, renders Markdown and Liquid templates, and spits out a complete, static website ready to be served by Apache, Nginx or another web server. Jekyll is the engine behind GitHub Pages, which you can use to host sites right from your GitHub repositories.
Hold on; what was that?
… renders Markdown and Liquid templates …
Templates!
My first result (actually the first five…) after googling “jekyll template” was the Jekyll Themes page. Under the section Understanding gem-based themes I read a word that sounded very familiar: “Minima”
That’s the theme my blog uses!
According to the Themes docs:
With gem-based themes, some of the site’s directories (such as the
assets,_data,_layouts,_includes, and_sassdirectories) are stored in the theme’s gem, hidden from your immediate view.
Okay, good to know.
That would explain
why I don’t see any of the directories in my repo except assets/.
Reading on:
Overriding theme defaults
Jekyll themes set default data, layouts, includes, and stylesheets. However, you can override any of the theme defaults with your own site content.
Interesting!
For example, if your selected theme has a
pagelayout, you can override the theme’s layout by creating your ownpagelayout in the_layoutsdirectory (that is,_layouts/page.html).
Ah! ✨HTML✨! Cue the angelic choir.
Now all I have to do is find my local _layouts/page.html file.
I wonder how… oh right.
It’s in the Themes docs:
- Run
bundle info --pathfollowed by the name of the theme’s gem, e.g.,bundle info --path minimafor Jekyll’s default theme.
So I run it.
$ bundle info --path minima
And of course I get an error:
Could not locate Gemfile or .bundle/ directory
😑
A few searches and Stack Overflow posts later, I run the following:
$ bundle init
This added a Gemfile to my repo directory.
I guess the previous command should work now?
$ bundle info --path minima
Eh! No. Now I get the error:
Could not find gem 'minima'.
New error equals… progress? 🤷
More searching yielded a new command (and a prayer 🙏):
$ bundle install
Another (!) new file was added to my directory, Gemfile.lock, and the following message was written:
The Gemfile specifies no dependencies
Bundle complete! 0 Gemfile dependencies, 1 gem now installed.
Use `bundle info [gemname]` to see where a bundle gem is installed.
Okay, the command has to work now—the output just told me to use it!
$ bundle info --path minima
Could not find gem 'minima'.
Grrrr… 😠
More searching.
At the top of the Jekyll home page I find the following command:
$ gem install bundler jekyll
I say “what the heck” and run it. Out comes some new text:
A new release of Ruby Gems is available: 3.4.10 -> 3.6.3!
Run `gem update --system 3.6.3` to update your installation.
Okay… why is this starting to feel like a wild goose chase?
I run the command anyway, followed by bundle update minima.
I figure a new command might give a new error.
But of course I was wrong 😂😭:
Could not find the gem 'minima'.
Back to Google.
I discover that I need to add gem "minima" to my Gemfile.
I open it up and sure enough there’s a commented out line that says # gem "rails".
I drop the new line right under it and rerun the previous command.
Bundle complete!
It worked!
I run bundle info --path minima and out pops the following (less some redactions 😉):
~/Ruby32-x64/lib/ruby/gems/3.2.0/gems/minima-2.5.2
Hallelujah!
I found the door to the HTML files.
A custom <head>
Immediately inside the minima-2.5.2/ directory I find the following:
📂 ~/Ruby32-x64/lib/ruby/gems/3.2.0/gems/minima-2.5.2
├── 📄 LICENSE.txt
├── 📄 README.txt
├── 📂 _includes
├── 📂 _layouts
├── 📂 _sass
└── 📂 assets
_layouts/ sounds like a good place to start (considering the docs said that’s where _layouts/page.html is).
📂 ~/Ruby32-x64/lib/ruby/gems/3.2.0/gems/minima-2.5.2
├── 📄 LICENSE.txt
├── 📄 README.txt
├── 📂 _includes
├── 📂 _layouts
│   ├── <> default.html
│   ├── <> home.html
│   ├── <> page.html
│   └── <> post.html
├── 📂 _sass
└── 📂 assets
Thinking back to all the blog posts I’ve written (including this one),
I’ve always set my front matter layout to "post".
And now there’s a file in the _layouts/ directory called "post.html".
Could this be the template for all of my posts?
🤔
Here are the contents of "post.html":
---
layout: default
---
<article class="post h-entry" itemscope itemtype="http://schema.org/BlogPosting">

  <header class="post-header">
    <h1 class="post-title p-name" itemprop="name headline">{{ page.title | escape }}</h1>
    <p class="post-meta">
      <time class="dt-published" datetime="{{ page.date | date_to_xmlschema }}" itemprop="datePublished">
        {%- assign date_format = site.minima.date_format | default: "%b %-d, %Y" -%}
        {{ page.date | date: date_format }}
      </time>
      {%- if page.author -%}
        • <span itemprop="author" itemscope itemtype="http://schema.org/Person"><span class="p-author h-card" itemprop="name">{{ page.author }}</span></span>
      {%- endif -%}</p>
  </header>

  <div class="post-content e-content" itemprop="articleBody">
    {{ content }}
  </div>

  {%- if site.disqus.shortname -%}
    {%- include disqus_comments.html -%}
  {%- endif -%}

  <a class="u-url" href="{{ page.url | relative_url }}" hidden></a>
</article>
And here’s a snippet of my very first blog post’s HTML rendering (via the inspector):
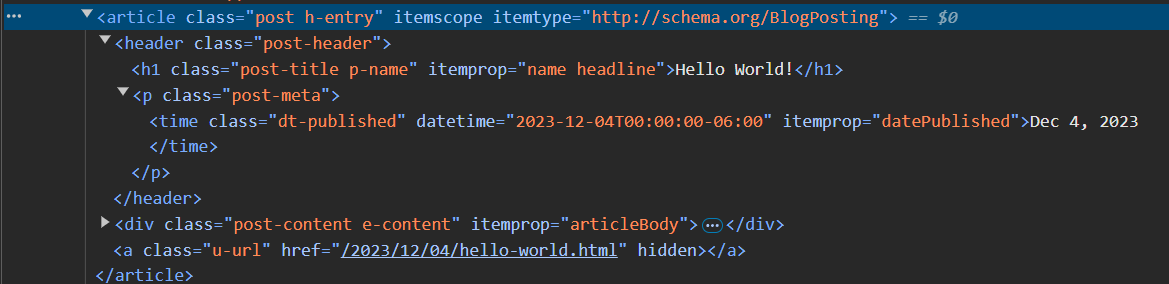
Looking only at the HTML elements, I think it’s fair to say “yes,” this is the template.
With a quick glance I can see that there isn’t a <head> element,
but there is front matter with the layout set to default.
Over to the _layouts/default.html I go.
<!DOCTYPE html>
<html lang="{{ page.lang | default: site.lang | default: "en" }}">

  {%- include head.html -%}

  <body>

    {%- include header.html -%}

    <main class="page-content" aria-label="Content">
      <div class="wrapper">
        {{ content }}
      </div>
    </main>

    {%- include footer.html -%}

  </body>

</html>
No front matter here,
but there is an include tag that specifically references “head.html”.
On to the _includes/ directory.
📂 ~/Ruby32-x64/lib/ruby/gems/3.2.0/gems/minima-2.5.2
├── 📄 LICENSE.txt
├── 📄 README.txt
├── 📂 _includes
│   ├── <> disqus_comments.html
│   ├── <> footer.html
│   ├── <> google-analytics.html
│   ├── <> head.html
│   ├── <> header.html
│   ├── <> icon-github.html
│   ├── 🖼️ icon-github.svg
│   ├── <> icon-twitter.html
│   ├── 🖼️ icon-twitter.svg
│   └── <> social.html
├── 📂 _layouts
│   ├── <> default.html
│   ├── <> home.html
│   ├── <> page.html
│   └── <> post.html
├── 📂 _sass
└── 📂 assets
Sure enough, there’s a _includes/head.html file.
<head>
  <meta charset="utf-8">
  <meta http-equiv="X-UA-Compatible" content="IE=edge">
  <meta name="viewport" content="width=device-width, initial-scale=1">
  {%- seo -%}
  <link rel="stylesheet" href="{{ "/assets/main.css" | relative_url }}">
  {%- feed_meta -%}
  {%- if jekyll.environment == 'production' and site.google_analytics -%}
    {%- include google-analytics.html -%}
  {%- endif -%}
</head>
And there resides the elusive <head> element.
According to the Jekyll docs, all I have to do to customize this is copy the file to my repo’s directory and then have my way with it. And that’s what I did.
# From my repo's directory...
$ cp ~/Ruby32-x64/lib/ruby/gems/3.2.0/gems/minima-2.5.2/_includes/head.html ./_includes/head.html
To make things easier on myself (and practice using an include tag),
I created an additional file in my new _includes/ directory—_includes/analytics.html—to hold my Google tag.
📂 it176131.github.io
└── 📂 _includes
    ├── <> analytics.html
    └── <> head.html
I then “included” the Google tag in _includes/head.html immediately after the <head> element
(just like the Google Analytics instructions said to):
<head>
  {% include analytics.html %}  <!-- RIGHT HERE!!! -->
  <meta charset="utf-8">
  <meta http-equiv="X-UA-Compatible" content="IE=edge">
  <meta name="viewport" content="width=device-width, initial-scale=1">
  {%- seo -%}
  <link rel="stylesheet" href="{{ "/assets/main.css" | relative_url }}">
  {%- feed_meta -%}
  {%- if jekyll.environment == 'production' and site.google_analytics -%}
    {%- include google-analytics.html -%}
  {%- endif -%}
</head>
To check if the tag was present on not just my blog posts but my main page as well, I spun up a local server and inspected the HTML:
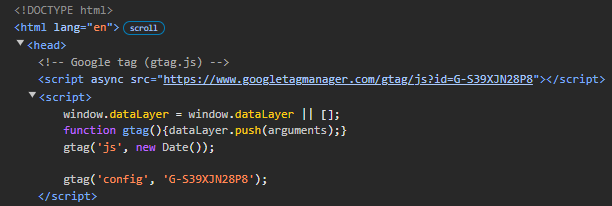
No errors! I must be getting the hang of this. 😏
I pushed all of my changes to GitHub and merged with my main branch. After deployment I checked my live-site and again saw the script. I felt like I had unlocked a level in my understanding of Jekyll, GitHub Pages, and HTML.
Two weeks later…
I sat down to write this post and procrastinated, but it resulted in an improvement: my giscuss comment section is now automatically included at the bottom of all my blog posts!
I achieved this using the skills I had learned adding the Google tag to my <head> element (and avoided all the errors from before 😁).
There were some subtle differences though, which I (briefly) describe below.
- Created
_includes/comments.htmlin my repo’s directory.📂 it176131.github.io └── 📂 _includes ├── <> analytics.html ├── <> comments.html └── <> head.html -
Added the giscuss
<script>that I normally add to the bottom of all of my blog posts.<script src="https://giscus.app/client.js" data-repo="it176131/it176131.github.io" data-repo-id="R_kgDOK1ukqg" data-category="Announcements" data-category-id="DIC_kwDOK1ukqs4CcOnS" data-mapping="pathname" data-strict="0" data-reactions-enabled="1" data-emit-metadata="0" data-input-position="top" data-theme="light" data-lang="en" data-loading="lazy" crossorigin="anonymous" async> </script> - Copied
_layouts/post.htmlfrom my minima directory to my repo.# From my repo's directory... $ cp ~/Ruby32-x64/lib/ruby/gems/3.2.0/gems/minima-2.5.2/_layouts/post.html ./_layouts/post.html📂 it176131.github.io ├── 📂 _includes │ ├── <> analytics.html │ ├── <> comments.html │ └── <> head.html └── 📂 _layouts └── <> post.html -
Added an
includetag to my repo-copy of_layouts/post.htmlreferencing my_includes/comments.html.--- layout: default --- <article class="post h-entry" itemscope itemtype="http://schema.org/BlogPosting"> <header class="post-header"> <h1 class="post-title p-name" itemprop="name headline">{{ page.title | escape }}</h1> <p class="post-meta"> <time class="dt-published" datetime="{{ page.date | date_to_xmlschema }}" itemprop="datePublished"> {%- assign date_format = site.minima.date_format | default: "%b %-d, %Y" -%} {{ page.date | date: date_format }} </time> {%- if page.author -%} • <span itemprop="author" itemscope itemtype="http://schema.org/Person"><span class="p-author h-card" itemprop="name">{{ page.author }}</span></span> {%- endif -%}</p> </header> <div class="post-content e-content" itemprop="articleBody"> {{ content }} </div> {% include comments.html %} <!-- RIGHT HERE!!! --> <a class="u-url" href="{{ page.url | relative_url }}" hidden></a> </article> - Checked that a giscuss comment
<script>existed on my blog posts prior to publishing Comments (I was too lazy to go back and add comments to my older posts 😅).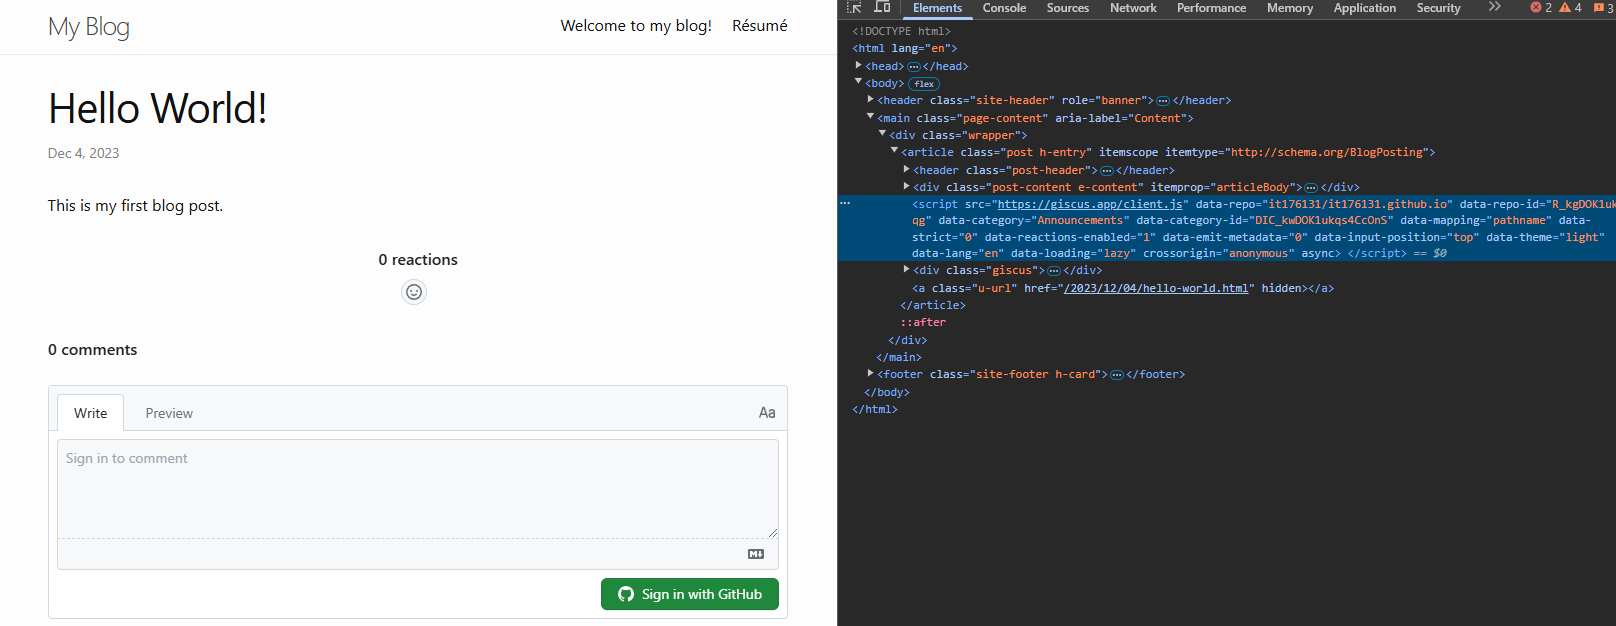
It exists ✅ - Deleted the giscuss comment
<script>elements from all the posts I had added it to and made sure that my existing comments remained. - Committed, pushed, and merged.
But why?
I successfully started tracking web traffic on February 1, 2025—the day after I published 2024: Year in Review. Two weeks after that I figured out how to automatically include a comment section at the end of every post I publish. For the last month I’ve been looking at my site’s web traffic off and on. It’s been enjoyable to see. I don’t have a lot of visitors (I probably account for +90% of them); maybe one or two a day with most of them going to my more recent posts. But it feels good to be seen.
In January 2024, when my site was just a few posts old, I added the ability to comment and react to my posts via giscuss. My goal was to get feedback on my posts. To have conversations with my readers.
After sharing my posts on LinkedIn to spread the word that I have a blog, a weird event occurred: readers started reacting and writing comments on my LinkedIn post rather than my actual blog posts.
It’s kind of funny. I go through an effort to allow interaction on my site and it turns out all I had to do was share on LinkedIn. I can think of reasons why this happened:
- readers don’t have GitHub accounts so can’t comment directly
- the path of least resistance to interact is on LinkedIn where the post was discovered
- etc.
Whatever it is, I welcome it.
I write the posts and share them in an effort to educate, learn, and converse. It shouldn’t matter how my students, teachers, readers, friends choose to interact as long as I can provide a way to do so. Comment on LinkedIn. React on my site. Whatever you do and where you do it, I see and read them all. And I appreciate it 🤗.