Stack Overflow's API
Thoughts have been running through my head for a few weeks about what my next blog post would be about. I know I promised a few people that it would be over basket analysis, but the more I tried to write about it the more I realized that I needed data to really make it stick. None of the data sets I found on the web jumped out at me, and that's probably because I didn't have an interest in what they were related to.
I don't know exactly when it clicked, but the idea of using Stack Overflow data sounded perfect.
So I aplogize to my readers for my delayed promise.
This post will be about using the python package
StackAPI to connect and interact with the
Stack Exchange API.
Registration
To use the API we need to Register For An App Key, also sometimes referred to as an API key. I've done this a couple times in the past (the second time because I couldn't find my first key).
If you ever forget or lose your key(s), you can find them at View Your Apps. Hindsight is 20/20.
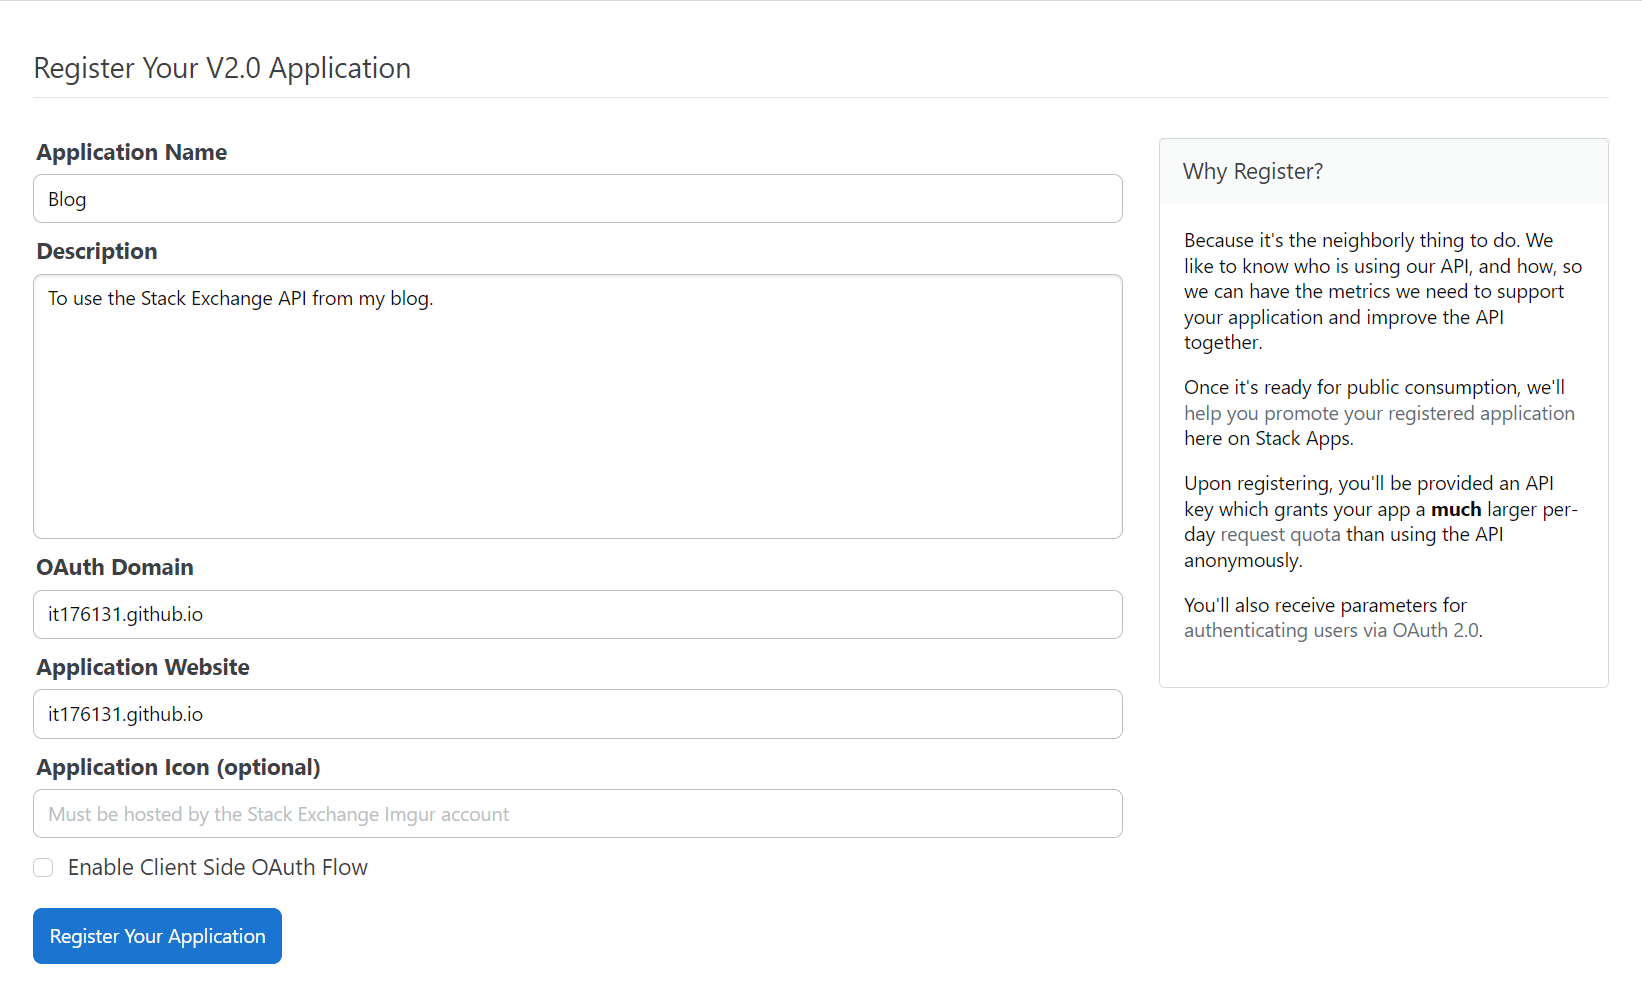
Give your app a name and a description of what you'll use it for. I've never actually built an "app" per se; I generally only use the API to pull and analyze data for funsies. The OAuth Domain would be your website's domain (if you have one), and the application website would be... well... wherever you plan on hosting your app! The previous times I've done this I set my OAuth domain to "stackexchange.com" and "NA" as my application website. Since I actually have a website now (my blog counts, right?), I'm going to register for a new App Key. Here's what mine looks like:

Clicking Register Your Application will send you to a new page where you can see the values you chose for OAuth Domain and Application Website. Towards the top is the more important stuff: Client Id, Client Secret, and Key. The Key is what we'll use to make requests against the API.
It's worth noting that we technically don't need to do this as we can make calls to the API without a key. However, having a key means we have a higher request quota, i.e. we can send more requests. I'll explain more below.
StackAPI
To make a call to the API we'll first install StackAPI.
You can do that by uncommenting the cell below and running it.
# !pip install StackAPI
After installing, let's run the example from the docs.
from stackapi import StackAPI

SITE = StackAPI("stackoverflow")
comments = SITE.fetch("comments")
The comments will be a python dictionary with both results from the call, as well as metadata.
type(comments)
dict
comments.keys()
dict_keys(['backoff', 'has_more', 'page', 'quota_max', 'quota_remaining', 'total', 'items'])
The "quota_max" tells us our max quota—the max number of calls we can make to the API in a day.
Note that I haven't tested this, but I believe the quota is based on 24 hours from your first call.
# Our max quota is...
comments["quota_max"]
300
The "quota_remaining" is how many more results we can fetch from the API.
When it hits zero, we have to wait for it to reset.
This is called throttling and you can read more about it here.
# Results may vary depending on the number of times the API was called.
comments["quota_remaining"]
215
The API Key
Before exploring more of comments, I want to call out that we have yet to use our API key.
While the key isn't technically a secret, I like to keep mine hidden away in my environment variables.
This keeps me from accidentally pushing it to the repo for others to use willy-nilly, wasting my quota.
To access my API key I import getenv from os and set the key argument in StackAPI to the result.
You may have to restart your terminal for the environment variable change to take affect.
from os import getenv

key = getenv("STACK_API_KEY")
SITE = StackAPI("stackoverflow", key=key)
comments = SITE.fetch("comments")
We can now see that my "quota_max" has increased to $10,000$.
comments["quota_max"]
10000
Data
We've increased our quota, now let's get some data.
Inside of comments there's a key called "items".
Each item is a comments object.
comment_0 = comments["items"][0]
comment_0
{'owner': {'account_id': 64461,
  'reputation': 217363,
  'user_id': 190277,
  'user_type': 'registered',
  'accept_rate': 94,
  'profile_image': 'https://www.gravatar.com/avatar/dcf9672c1893e4b7c5d86ca1bc2bf88f?s=256&d=identicon&r=PG',
  'display_name': 'Ben Bolker',
  'link': 'https://stackoverflow.com/users/190277/ben-bolker'},
 'edited': False,
 'score': 0,
 'creation_date': 1710030491,
 'post_id': 78134082,
 'comment_id': 137747959,
 'content_license': 'CC BY-SA 4.0'}
There are millions, if not billions, of comments on Stack Overflow. To avoid crashing the site's servers, the API limits the number of items returned to 100 results per page for a max of five pages. That's $100 \times 5 = 500$ results at most.
len(comments["items"])
500
Typically the results returned are the most recently created (descending order).
from datetime import datetime

# The creation date is relatively recent.
# Results may vary depending on when data was fetched.
datetime.fromtimestamp(comment_0["creation_date"])
datetime.datetime(2024, 3, 9, 18, 28, 11)
You can modify the underlying query by supplying different keyword arguments (kwargs) to the fetch method.
For example, this is how you'd return the oldest comments first (ascending order).
comments_asc = SITE.fetch("comments", **{"order": "asc"})
comments_asc_0 = comments_asc["items"][0]
datetime.fromtimestamp(comments_asc_0["creation_date"])
datetime.datetime(2008, 8, 1, 9, 58, 15)
Per the Usage of /comments,
I knew to set order="asc" based on the URL query at the bottom.
You can try changing other parameters and see how these affect the returned results.
After that you may wish to define your own custom filters.
See here for more documenation.
Conclusion
This has been a very high level intro to the Stack Exchange API using the StackAPI package.
I will reference back to it in future posts whenever I need to pull data related to the site.
I encourage you to play around with it yourself.
As an exercise, try to fetch all comments written by me.
Hint: The number of comments should match the number on this page.